Ditch the Takeout! Master Homemade Chicken Parmesan Like a Pro
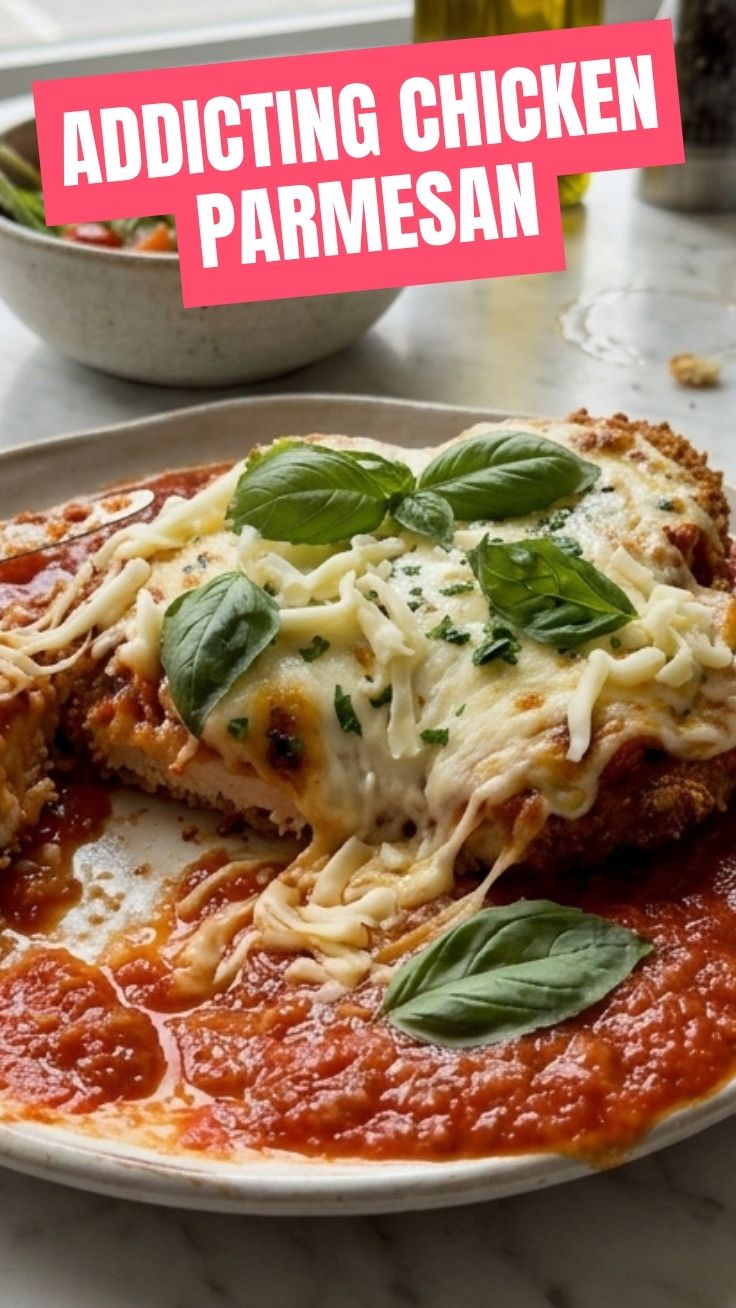
Tired of bland, overpriced restaurant meals? Imagine sinking your teeth into a perfectly crispy, juicy chicken cutlet smothered in rich marinara and melted mozzarella, all made in your own kitchen. This isn’t just about cooking; it’s about creating a memorable culinary experience. And today, we’re diving deep into crafting the ultimate homemade Chicken Parmesan. Forget complex techniques, because with our comprehensive guide, you’ll be whipping up this Italian-American classic like a seasoned chef. Beyond the incredible flavor, preparing this dish at home offers unparalleled control over ingredients, ensuring fresh, wholesome goodness for you and your loved ones. Get ready to impress with this sensational chicken parmesan recipe that will quickly become a family favorite.
Ingredients & Kitchen Tools
Here’s everything you’ll need to bring this culinary masterpiece to life:
- Boneless, Skinless Chicken Breasts (4 large, about 1.5 lbs total): The star of our show. Opt for organic for best flavor.
- Plain Breadcrumbs (1.5 cups): Panko breadcrumbs (Japanese-style) offer superior crispiness.
- Grated Parmesan Cheese (1/2 cup): Don’t skimp here; use freshly grated for optimal flavor.
- All-Purpose Flour (1/2 cup): For dredging, creating a perfect crust.
- Large Eggs (2): Beaten, to help the breading adhere.
- Marinara Sauce (24 oz jar or homemade): Your go-to red sauce. A good quality jarred sauce works wonders.
- Fresh Mozzarella Cheese (8 oz): Sliced or shredded. Fresh mozzarella melts beautifully.
- Fresh Basil (1/4 cup chopped): For garnish and a burst of herbaceous freshness.
- Olive Oil (1/2 cup, and extra for drizzling): For pan-frying and a touch of flavor.
- Garlic Powder (1 tsp): Adds aromatic depth to the breading.
- Onion Powder (1/2 tsp): Complements the garlic and enhances savory notes.
- Salt & Black Pepper (to taste): Essential for seasoning every layer.
- Kitchen Mallet/Meat Tenderizer: For pounding chicken to an even thickness.
- Shallow Dishes (3): For your breading station (flour, egg, breadcrumbs).
- Large Skillet/Oven-Safe Pan: For pan-frying and finishing in the oven.
- Baking Sheet: If transferring from skillet to oven.
Prep Time & Cooking Schedule
- Prep Time: 20 minutes (includes pounding, breading, and cheese slicing).
- Cook Time: 25-30 minutes (pan-frying + baking).
- Resting Time: 5 minutes (after baking, before serving, to allow juices to redistribute).
This schedule makes it perfect for a weeknight family dinner or a weekend gathering. The key is to have all your ingredients prepped and ready before you start cooking, ensuring a smooth and enjoyable process.
Step-by-Step Instructions
1. Pound the Chicken: Place each chicken breast between two sheets of plastic wrap. Using a meat mallet, pound them to an even 1/2-inch thickness. This ensures even cooking and tenderness. Season both sides with salt and pepper.
2. Set Up Breading Station: In three shallow dishes, set up your stations: one with flour, one with beaten eggs, and one with a mixture of breadcrumbs, grated Parmesan, garlic powder, onion powder, salt, and pepper.
3. Bread the Chicken: Dredge each chicken cutlet first in flour (shaking off excess), then dip in the egg mixture (allowing excess to drip off), and finally coat generously in the breadcrumb mixture, pressing gently to adhere.
4. Pan-Fry: Heat olive oil in a large skillet over medium-high heat until shimmering. Carefully place 2-3 breaded chicken cutlets (don’t overcrowd the pan) and pan-fry for 3-4 minutes per side, until golden brown and crispy. The internal temperature should be around 140°F (60°C) at this stage. Transfer to a paper towel-lined plate to drain excess oil.
5. Assemble & Bake: Preheat oven to 375°F (190°C). Pour a thin layer of marinara sauce into the bottom of an oven-safe skillet or baking dish. Arrange the pan-fried chicken cutlets on top. Spoon more marinara sauce over each piece, then top with slices of fresh mozzarella.
6. Finish in Oven: Bake for 10-15 minutes, or until the cheese is bubbly and melted, and the internal temperature of the Chicken Parmesan reaches 165°F (74°C). The scent of this homemade chicken parmesan recipe will be absolutely intoxicating!
7. Serve & Garnish: Let rest for 5 minutes. Garnish with fresh basil before serving.
Nutritional Benefits & Advantages
This homemade Chicken Parmesan is more than just comfort food; it offers substantial nutritional value. Chicken breast is an excellent source of lean protein, essential for muscle repair and growth, and is rich in B vitamins like niacin and B6, crucial for energy metabolism. Tomatoes in the marinara sauce are packed with lycopene, a potent antioxidant, and Vitamin C, which supports immune function. While cheese gets a bad rap, mozzarella provides calcium for bone health and contributes beneficial fats in moderation. By making it at home, you control the amount of oil, salt, and sugar, avoiding excessive additives often found in commercially prepared versions.
Tips, Variations & Cooking Advice
- Spice It Up: Add a pinch of red pepper flakes to your breadcrumb mixture or marinara for a spicy kick.
- Herbs: Incorporate dried oregano or Italian seasoning into the breadcrumbs for more aromatic depth.
- Gluten-Free: Use gluten-free flour and gluten-free breadcrumbs for a delicious alternative.
- Air Fryer Method: For a crispier, less oily option, air fry breaded cutlets at 375°F (190°C) for 10-12 minutes, flipping halfway, then proceed with the sauce and cheese in the oven.
- Vegetarian Option: Swap chicken for eggplant slices for a delightful Eggplant Parmesan.
Common Mistakes to Avoid
- Overcrowding the Pan: This lowers the oil temperature and prevents the chicken from browning properly, leading to soggy cutlets. Cook in batches if necessary.
- Pounding Too Thin/Unevenly: Chicken that’s too thin will dry out quickly, while uneven thickness leads to inconsistent cooking. Aim for 1/2-inch.
- Skipping the Rest: Resting allows the chicken’s juices to redistribute, resulting in a more tender and flavorful finished product.
- Using Pre-Shredded Cheese: These often contain anti-caking agents that hinder a smooth, melt. Use fresh mozzarella.
Storage & Meal Prep Tips
Leftover Chicken Parmesan stores wonderfully! Allow it to cool completely, then transfer to an airtight container. It will last in the refrigerator for up to 3-4 days. To reheat, place in an oven or toaster oven at 350°F (175°C) for 10-15 minutes until heated through and the cheese is bubbly again. Avoid microwaving if possible, as it can make the breading soggy. For longer storage, freeze individual portions in an airtight container for up to 2-3 months. Thaw overnight in the refrigerator before reheating.
Conclusion
Crafting your own Chicken Parmesan from scratch is an incredibly rewarding experience, resulting in a dish that far surpasses any restaurant version. With this detailed guide, you’ve gained the knowledge and confidence to create a truly spectacular meal, packed with flavor and made with love. We encourage you to try this amazing chicken parmesan recipe, personalize it to your taste, and share your delicious results with us! Happy cooking!
FAQs
1. Can I use chicken thighs instead of breasts?
Yes, boneless, skinless chicken thighs can be used, but pound them to an even thickness and adjust cooking time as they may take slightly longer. The flavor will be richer.
2. How do I prevent the breading from falling off?
Ensure each step of the breading process is thorough: flour first (shaking off excess), then firm coating in egg, followed by pressing the breadcrumbs firmly onto the cutlet. Don’t touch the chicken too much once it’s in the oil.
3. What’s the best side dish to serve with Chicken Parmesan?
Pasta (spaghetti or fettuccine) is a classic choice. A simple green salad with a vinaigrette or roasted asparagus also pairs wonderfully.
4. Can I make the chicken ahead of time?
You can bread the chicken cutlets a few hours in advance and keep them refrigerated on a baking sheet, covered loosely with plastic wrap. This helps the breading adhere better. However, for best crispness, pan-fry just before assembling and baking.
5. Is there a dairy-free option for the cheese?
Absolutely! Many brands offer excellent dairy-free mozzarella shreds or slices that melt well. Be sure to check the ingredients if you have strict dietary requirements.